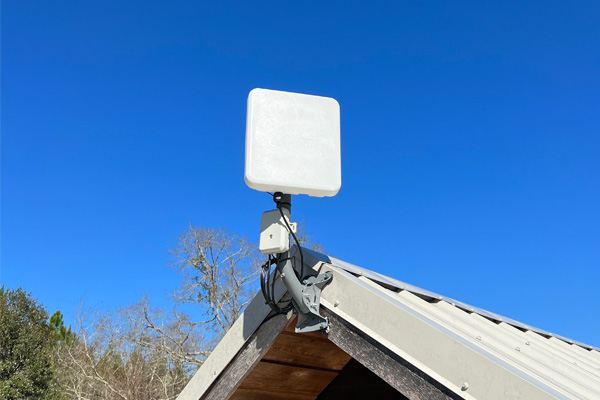
Your traditional normal install. We will find the rafters on the roof and pre-drill into them. We then sink 2-4 lags through mastic tape which acts as a weather proofing sealant.
There are multiple ways to run the cable from your roof:
Across the ridge cap
Down the valley with staples
For metal roofs, we can unscrew the ridge cap and tuck the cable underneath
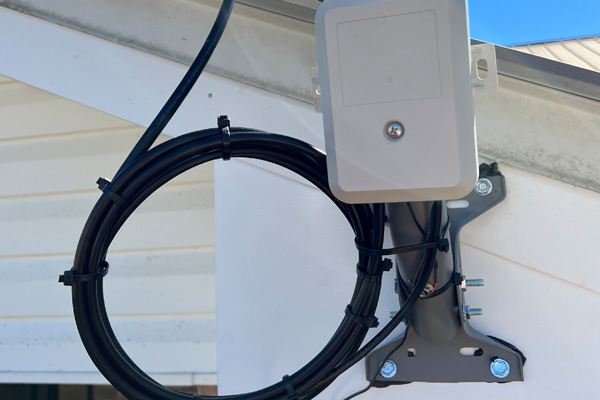
On the mount itself, we will install a lightning protection unit. This lightning protection unit is where all grounds bond to. From there the ground will run to your ground network.
We will run a single 14AWG copper-clad ground wire along the cat5 as well. This ground wire must be ran to your home's grounding network. Most of the time, this will be your electrical panel. It is your responsibility to make sure your home is properly grounded.
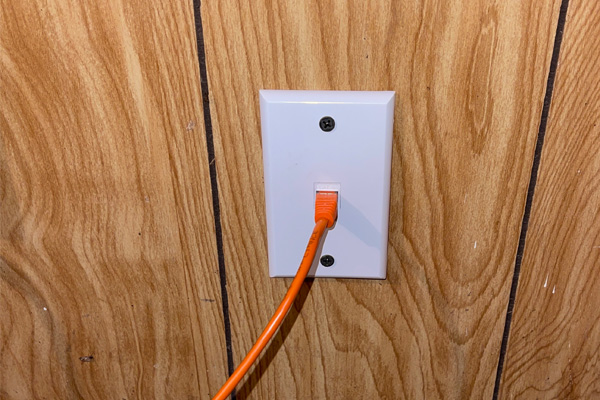
Point of Entry
You have a few options with how the cable will run into the home:
Through an exterior wall requiring a 3/8" hole with a weather grommet and silicone to seal it up
Through a crawl space, ran through the floor requiring a 3/8" hole sealed with silicone
Attic run and wall drop (upcharge). We reserve the right to refuse
Interior
On the inside, there are two options for cabling:
Keystone with a faceplate (Prefered)Figure 1.3
Ethernet ran directly inside
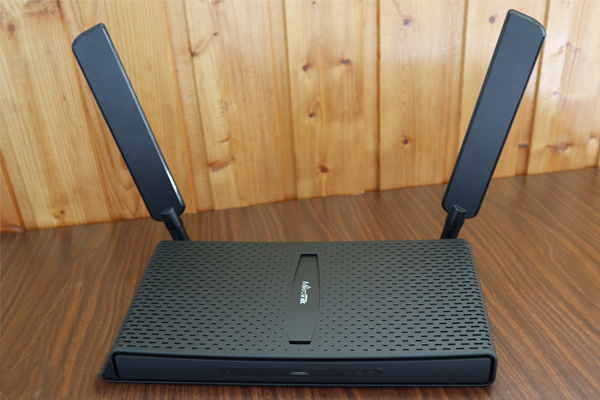
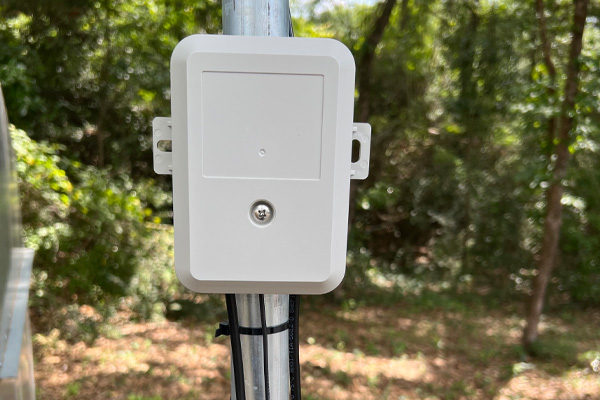
Inside we will install two pieces of equipment, a router and a PoE brick.
The Router can be positioned horizontally or vertically. Figure 1.2
The PoE brick will sit next to the router, this is used to power the radio outside.
Pricing for Walton:
Basic 25
Contract
Speeds
Install Fee
Activation Fee
Monthly Payment
Cancellation
No Contract
25mbps/3mbps
$100
$100
$47.57
$0
12 Month Contract
25mbps/3mbps
$100
$50
$47.57
$15/months left
24 Month Contract
25mbps/3mbps
$100
$0
$47.57
$15/months left
Enhanced 100
Contract
Speeds
Install Fee
Activation Fee
Monthly Payment
Cancellation
No Contract
100mbps/20mbps
$100
$100
$63.42
$0
12 Month Contract
100mbps/20mbps
$100
$50
$63.42
$15/months left
24 Month Contract
100mbps/20mbps
$100
$0
$63.42
$15/months left
Pricing for Washington:
Basic 25
Contract
Speeds
Install Fee
Activation Fee
Monthly Payment
Cancellation
No Contract
25mbps/3mbps
$150
$100
$89.85
$0
12 Month Contract
25mbps/3mbps
$100
$100
$73.99
$15/months left
24 Month Contract
25mbps/3mbps
$0
$100
$58.14
$15/months left
Enhanced 100
Contract
Speeds
Install Fee
Activation Fee
Monthly Payment
Cancellation
No Contract
100mbps/20mbps
$150
$100
$110.99
$0
12 Month Contract
100mbps/20mbps
$100
$100
$95.13
$15/months left
24 Month Contract
100mbps/20mbps
$0
$100
$79.28
$15/months left
Image Gallery
Figure 1.1Figure 1.2Figure 1.3
Facia Install
Your next option if you don't want holes in your roof. We will find the 2x4s behind the facia and pre-drill into them. We then sink 2-4 lags through mastic tape which acts as a weather proofing sealant.
There are multiple ways to run the cable from the facia:
Through the soffit
Down the face of the wall using clips with anchors
On the mount itself, we will install a lightning protection unit Figure 1.2. This lightning protection unit is where all grounds bond to. From there the ground will run to your ground network.
We will run a single 14AWG copper-clad ground wire along the cat5 as well. This ground wire must be ran to your home's grounding network. Most of the time, this will be your electrical panel. It is your responsibility to make sure your home is properly grounded.
Image Gallery
Figure 1.1Figure 1.2Figure 1.3
Peak Install
Your final option on your home if you don't want holes in your roof. We will find the 2x4s behind the peak and pre-drill into them. We then sink 2-4 lags through mastic tape which acts as a weather proofing sealant.
There are multiple ways to run the cable from the peak:
Through the soffit
Down the face of the wall using clips with anchors
On the mount itself, we will install a lightning protection unit Figure 1.2. This lightning protection unit is where all grounds bond to. From there the ground will run to your ground network.
We will run a single 14AWG copper-clad ground wire along the cat5 as well. This ground wire must be ran to your home's grounding network. Most of the time, this will be your electrical panel. It is your responsibility to make sure your home is properly grounded.
Image Gallery
Figure 1.1Figure 1.2Figure 1.3
Yard Pole Install
If you don't want anything on your home then a yard pole is your best option. Yard poles don't work for everyone, sometimes we need to be as high as we can get.
If you can get a passing signal from your roof, then there will be a $50 upcharge for the yard pole.
If you live in a Camper/RV the only way to get you service is with a yard pole or a mast. There is no additional charge for these circumstances.
With a yard pole, we will dig 3'-4' in the ground and use a single bag of sika post mix which is an alternative to concrete. Once the pole is installed, the only way to get it out is by digging it out.
Running cable from yard pole:
We do not trench, the cable will be ran across the ground and will be the your responsibility to bury it.
If the cable is damaged during burial, a $100 Service Call Fee will be applied to your account.
It is recommended to attach a 90 degree elbow where the cable from the pole meets the ground. This is for your protection if you weed eat around the pole. If you break the cable, a service call fee will be applied again.
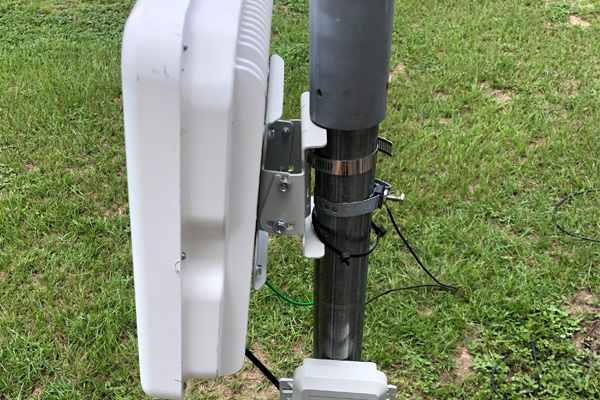
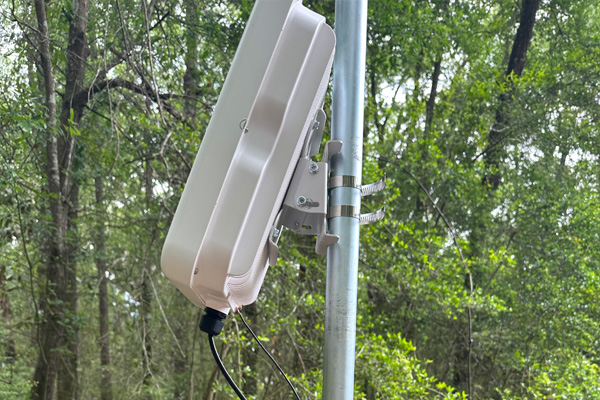
On the mount itself, we will install a lightning protection unit. This lightning protection unit is where all grounds bond to. From there the ground will run to your ground network.
We will run a single 14AWG copper-clad ground wire along the cat5 as well. This ground wire must be ran to your home's grounding network. Most of the time, this will be your electrical panel. It is your responsibility to make sure your home is properly grounded.